
This simple DIY succulent centerpiece is beautiful on the dining room table and the best part is you can keep it up year round! Grab the kids- they can definitely help make this one!
As an Amazon Associate I earn from qualifying purchases, at no extra charge to you. Click here to read my full disclosure.
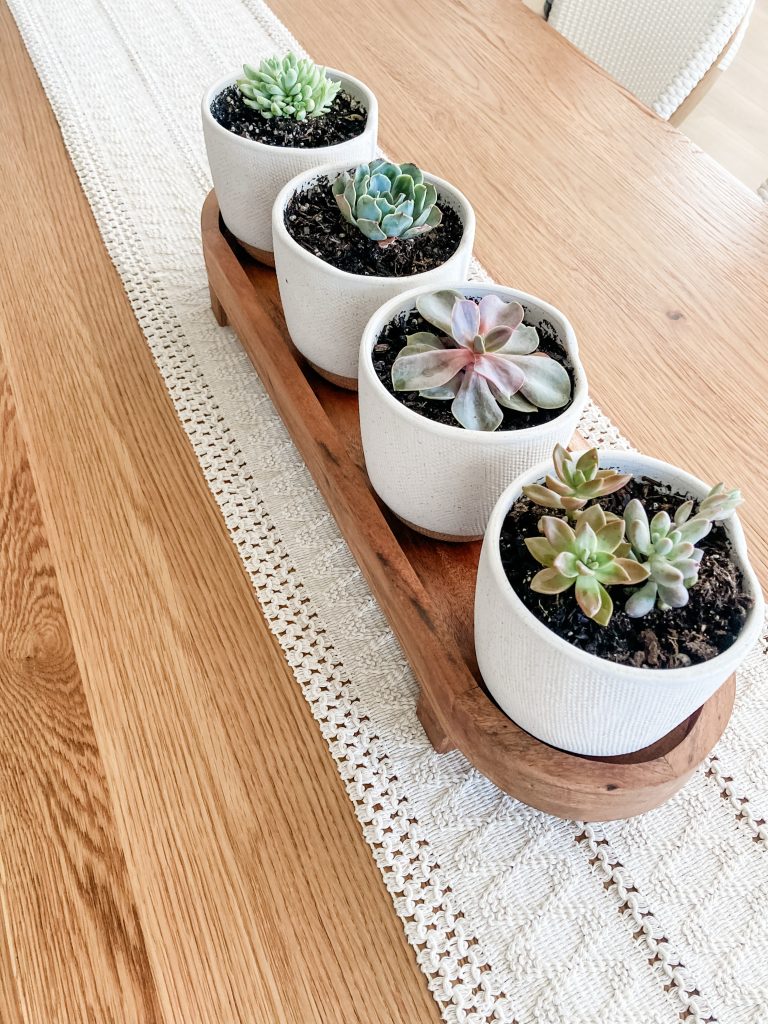
I’ve always loved the look of table centerpieces but I struggle to find one to fit my own home. I need one that is large enough so the table doesn’t swallow it (no pun intended) but also easy to pick up in a flash in case the kids make a grab for it or something gets spilled during mealtime. If this sounds like you, look no further! Below I will walk you through step by step on how to create this simple, beautiful succulent centerpiece and leave links for the necessary items below so you don’t waste your precious time searching for them.
First, a Bit About Succulents
What Are Succulents
Plants that store water in their roots, stems and/or leaves are succulents. Retaining water this way makes them drought resistant and the plants often appear fleshy or engorged.
Do Succulents Need Sun or Shade
Generally speaking, succulents require bright light and a lot of it. The recommended amount of light per day is at least 6 hours. The plants used in this article, however, are advertised as ‘partial shade’.
How Often Do You Water a Succulent
When the top 1 1/2 inch of soil is completely dry, it’s time to water the plant. In spring and summer (active growth period) it may be up to twice a week. Fall and winter (rest period) will be less frequent.
How Do You Take Care of a Succulent
Avoid plastic pots, as they will hold in moisture and may lead to overwatering. Planting in well draining soil is key, as well as having a pot with drainage holes. Exposure to light is absolutely necessary, preferably sunlight but a grow light will do. Watering in the mornings will allow proper drainage before nighttime, when the plants are inactive and may grow bacteria on the roots as water sits rather than absorbs. Ideally, watering should be done by placing the pot on a tray and allowing the moisture to absorb through the drainage holes until the top soil is damp. Practically, in my house, a spouted watering can is used over a sink to water from above until water comes out of the drainage holes.
How To Make the Table Centerpiece
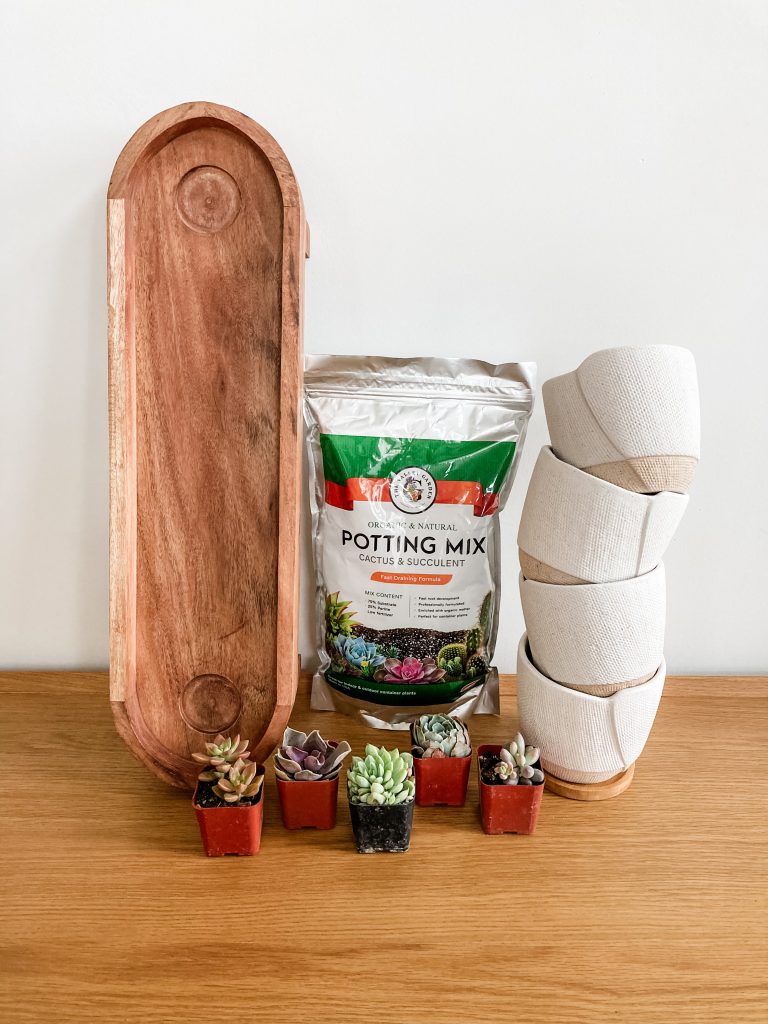
Gather Items
For this project you will need a piece of cardboard or towel, a tray, succulent pots with drainage holes, potting mix, live succulents and an optional grow light. The wooden tray I am using is actually a chip + dip serving tray I picked up from Home Goods so feel free to get creative!
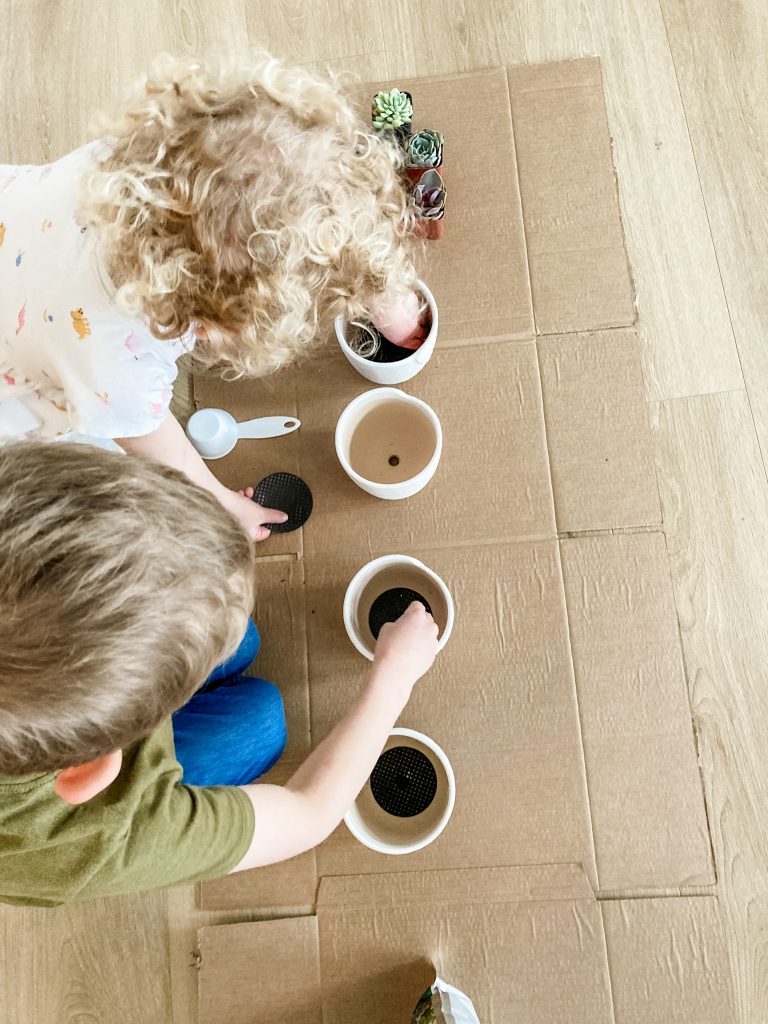
Insert Drain Screens
Lay out your cardboard or towel for easy clean up and grab the drain screens. Drain screens are not necessary but they will make your life easier as you care for your new plant friends. The point of the screen is to let water out but keep soil in. Water drainage is essential for preventing root rot in these plants and no one wants to leave behind a trail of wet soil once watering is done.
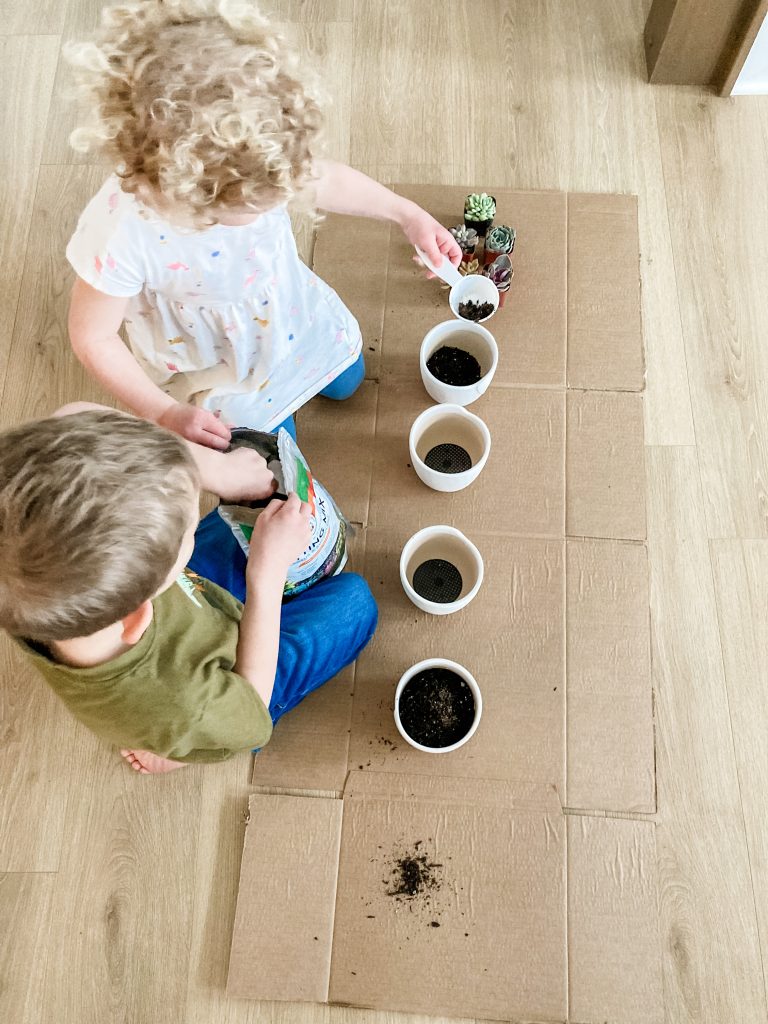
Fill Succulent Pots With Potting Mix
The new pots will be quite a bit bigger than the nursery pots your succulents came in. Fill the pots a little more than halfway with potting mix before placing your new plants in them.
Carefully Remove Succulents From Nursery Pot
Give the nursery pot a gentle squeeze on all side to loosen the soil/roots. While gently supporting the succulent leaves, tilt the pot to the side slightly to let it “fall out” of the nursery pot. You may need to pull (gently!) on the plant to fully remove it. If the soil is clumped in the shape of the nursery pot you will want to carefully spread the roots before placing in the new soil. To do this, use one finger to separate the soil/roots from the bottom until it is loosened up. You don’t want to go all the way to the leaves, as this will make the plant completely crumble. The goal here is to spread the roots so they are able to grow in the new soil.
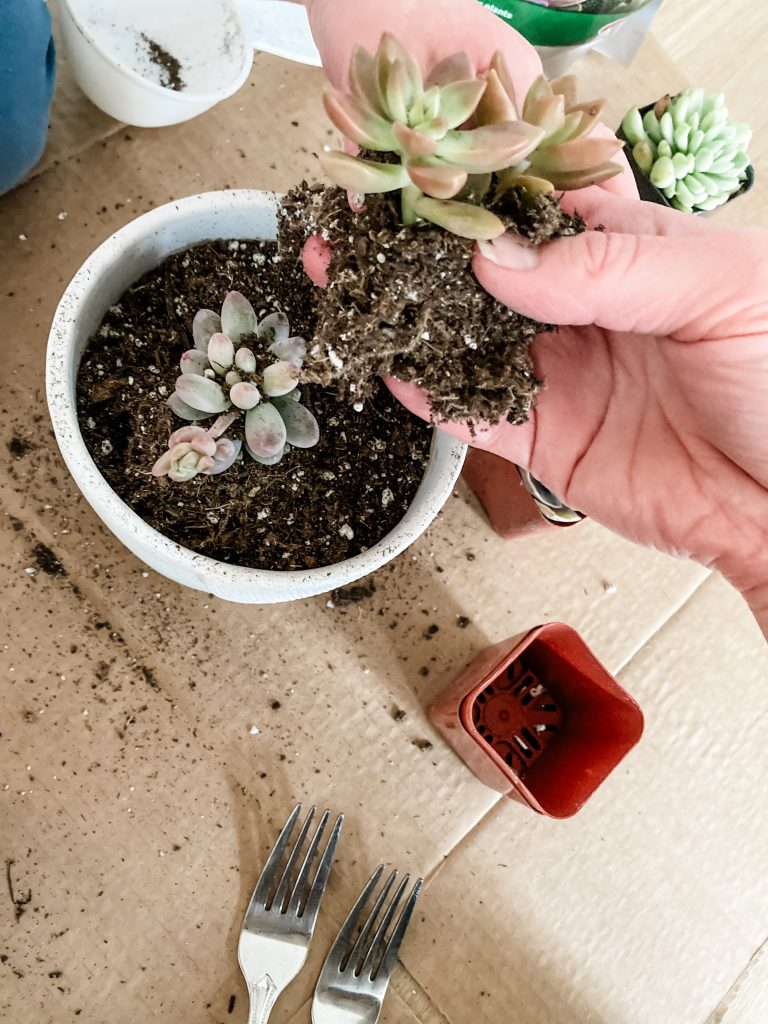
Place Succulents Into Pots & Fill In
Now it’s time to get those babies into the pots! Once the succulent is in the pot fill in the empty space around it with potting mix. I found this bag of potting mix filled these four pots well.
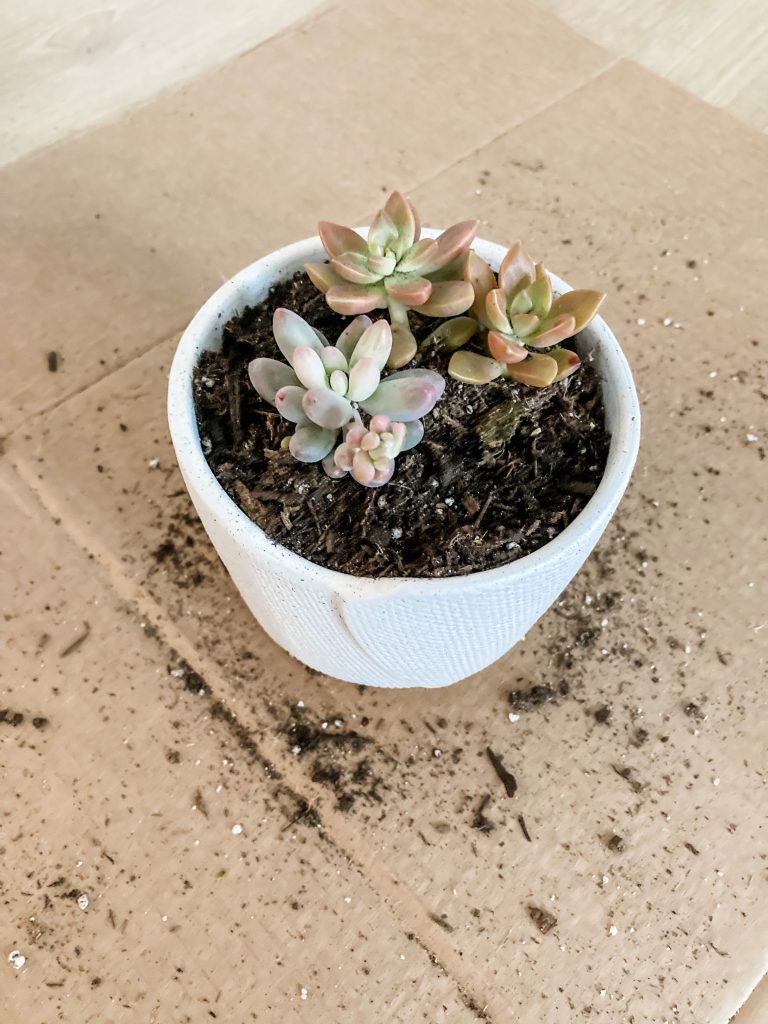
That’s it! Once the pots are assembled wait at least one week to water them. This will give them time to settle into the new environment. Watering too soon will stress them out.
Light Considerations
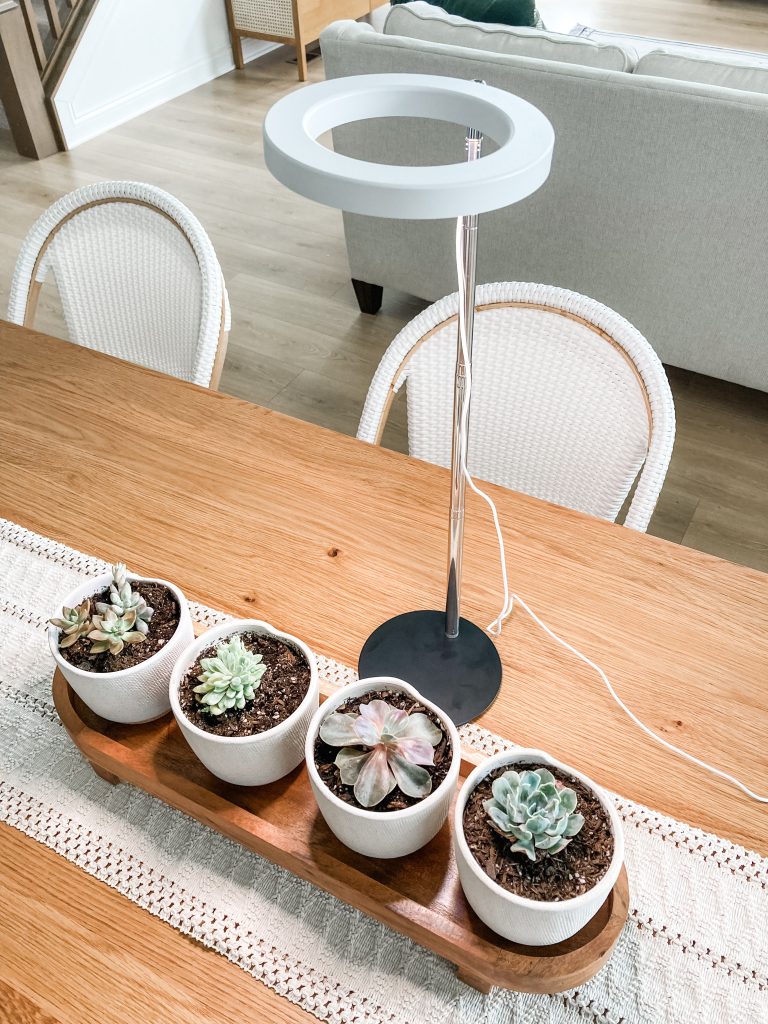
Depending on the lighting around your table you may want to consider buying a grow light. Succulents are very adaptable but they do need sufficient light. Our home is an open concept style so the succulents get indirect light from the upper living room windows. I opted to give the plants a bit of a boost every now and then and this grow light covers them all well. I’ll pop it on a timer before leaving the house so it’s not an eye sore when we’re home! When not in use, it stows away in a kitchen cabinet nicely. If using an LED grow light keep it 18″ above the succulents to prevent burning the leaves.
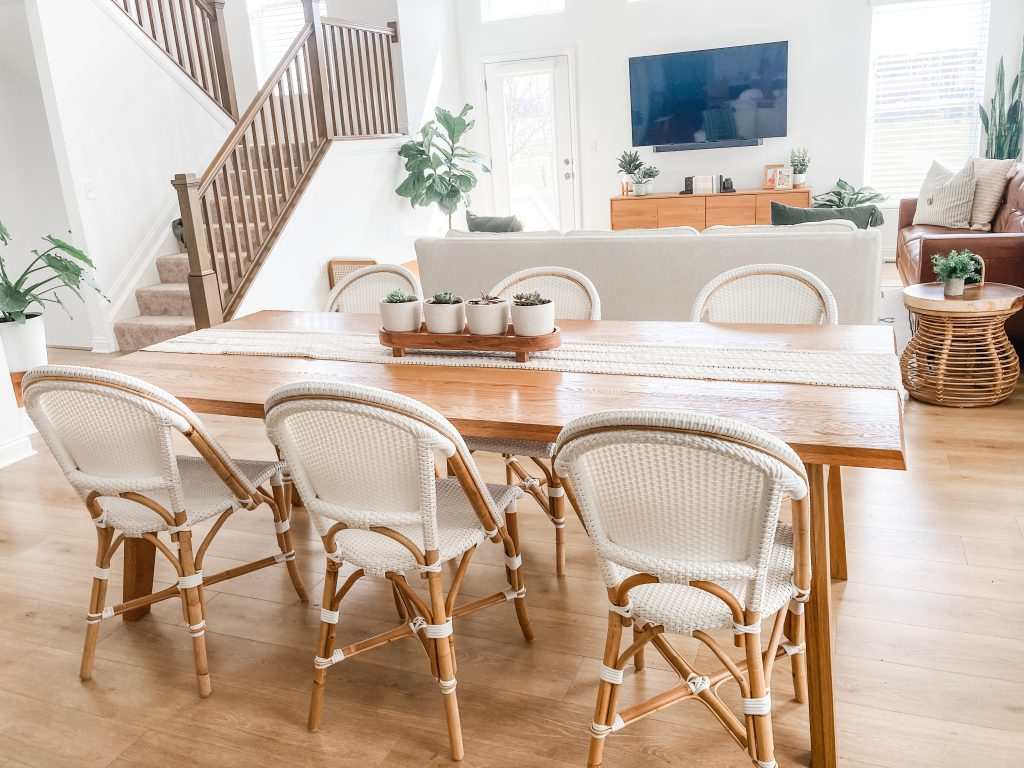
Now let’s see how this project looks in a room! I love how this simple centerpiece adds a little life to the table while fitting in perfectly with the vibe of our home.
Shop This Post
- Table Runner
- [Similar] Wooden Tray
- Ceramic Pots with Drainage Holes + Screens
- Succulent Potting Mix
- Live Succulent Plants
- LED Grow Light
If you choose to give this simple DIY succulent centerpiece a try I’d love for you to come back and drop a comment below to tell me how it went!
Leave a Reply